P2.物体点击高亮
大约 2 分钟
PlayerController中的高亮功能
1. 添加高亮启动/关闭/检测
void AAuraPlayerController::CursorTrace()
{
    // 碰撞通道
    const ECollisionChannel TraceChannel = ECollisionChannel::ECC_Visibility;

    // 获取光标下的碰撞信息,并存储在CursorHit中
    GetHitResultUnderCursor(TraceChannel, false, CursorHit);

    // 如果光标下没有阻挡的对象,直接返回
    if (!CursorHit.bBlockingHit) return;

    // 保存上一个高亮的对象
    LastActor = ThisActor;

    // 获取当前光标下的对象,并检查其有效性和是否实现了高亮接口
    AActor* HitActor = CursorHit.GetActor();
    if (IsValid(HitActor) && HitActor->Implements<UHighlightInterface>())
    {
        ThisActor = HitActor; // 当前对象有效且可高亮,设置为ThisActor
    }
    else
    {
        ThisActor = nullptr; // 当前对象无效或不支持高亮,设置为nullptr
    }

    // 如果当前对象与上一个对象不同,则更新高亮状态
    if (LastActor != ThisActor)
    {
        // 取消上一个对象的高亮效果
        UnHighlightActor(LastActor);
        // 为当前对象添加高亮效果
        HighlightActor(ThisActor);
    }
}

void AAuraPlayerController::HighlightActor(AActor* InActor)
{
    if (IsValid(InActor) && InActor->Implements<UHighlightInterface>())
    {
        IHighlightInterface::Execute_HighlightActor(InActor);
    }
}

void AAuraPlayerController::UnHighlightActor(AActor* InActor)
{
    if (IsValid(InActor) && InActor->Implements<UHighlightInterface>())
    {
        IHighlightInterface::Execute_UnHighlightActor(InActor);
    }
}
2. 显示鼠标、设置输入模式
// 显示鼠标
bShowMouseCursor = true;
DefaultMouseCursor = EMouseCursor::Default;

// 设置输入模式
FInputModeGameAndUI InputModeData;
InputModeData.SetLockMouseToViewportBehavior(EMouseLockMode::DoNotLock);
InputModeData.SetHideCursorDuringCapture(false);
SetInputMode(InputModeData);
3. 定义高亮接口 HighlightInterface
#include "CoreMinimal.h"
#include "UObject/Interface.h"
#include "HighlightInterface.generated.h"

UINTERFACE(MinimalAPI, BlueprintType)
class UHighlightInterface : public UInterface
{
    GENERATED_BODY()
};

class GAMEPLAYABILITY_API IHighlightInterface
{
    GENERATED_BODY()
public:
    UFUNCTION(BlueprintNativeEvent)
    void HighlightActor();

    UFUNCTION(BlueprintNativeEvent)
    void UnHighlightActor();
};
4. Actor中实现高亮接口
AMyActor::AMyActor()
{
    // 设置碰撞通道
    GetMesh()->SetCollisionResponseToChannel(ECC_Visibility, ECR_Block);
    // 设置自定义深度
    GetMesh()->SetCustomDepthStencilValue(250);
    GetMesh()->MarkRenderStateDirty();
}

void AMyActor::HighlightActor_Implementation()
{
    // 高亮时显示
    GetMesh()->SetRenderCustomDepth(true);
}

void AMyActor::UnHighlightActor_Implementation()
{
    // 取消高亮时显示
    GetMesh()->SetRenderCustomDepth(false);
}
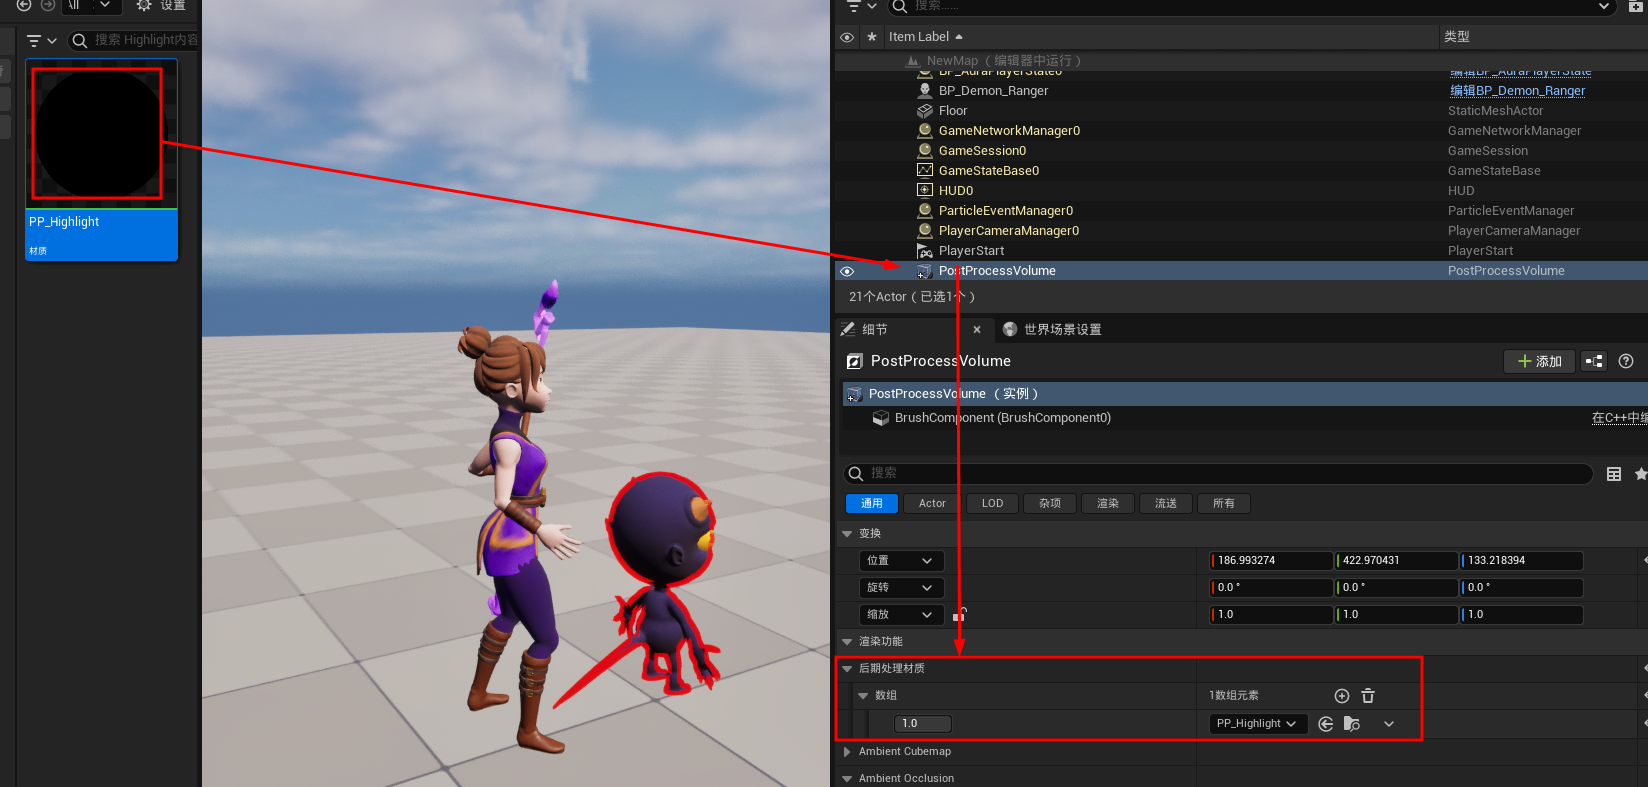
5. 高亮材质


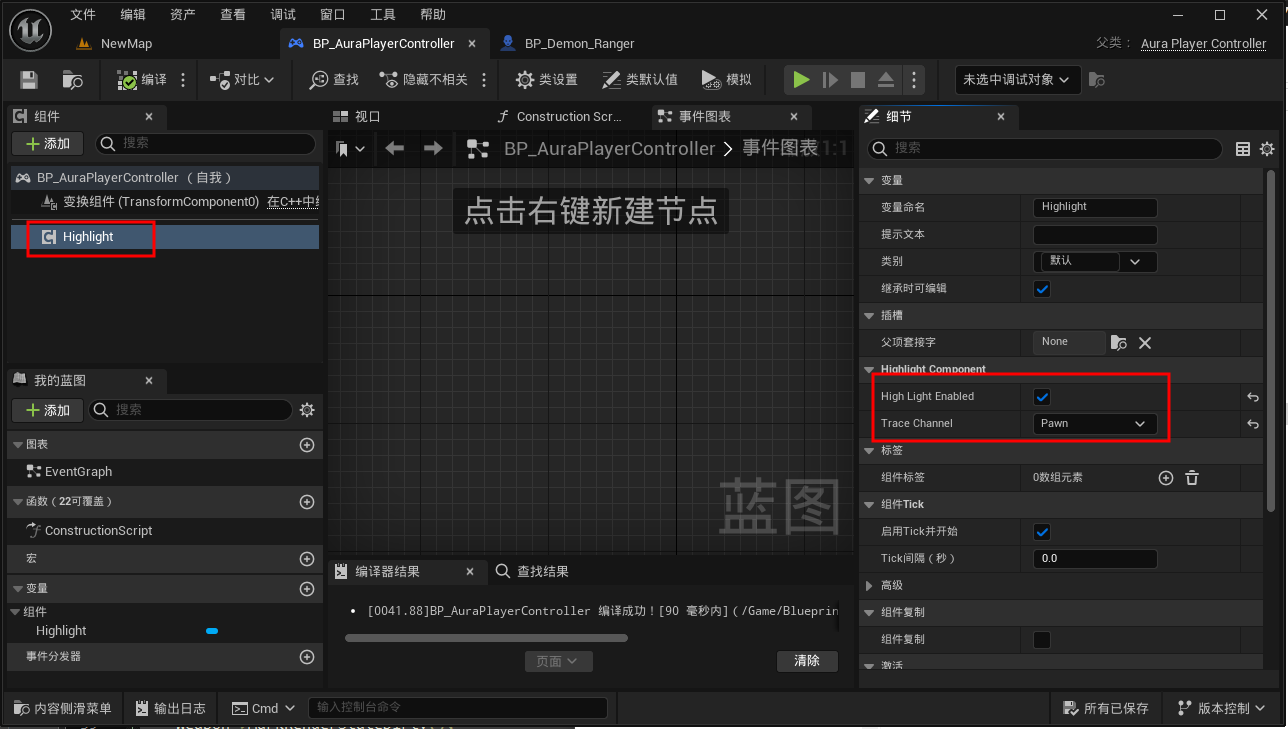
public:
	UFUNCTION(BlueprintCallable, Category = "HighlightComponent")
	void SetHighLightEnabled(bool bEnabled);
	//cpp
	void UHighlightComponent::SetHighLightEnabled(bool bEnabled)
    {
        bHighLightEnabled = bEnabled;
        bHighLightEnabled ? SetComponentTickEnabled(true) : SetComponentTickEnabled(false);
    }
private:

	UPROPERTY(VisibleAnywhere, BlueprintReadOnly, Category = "HighlightComponent", meta = (AllowPrivateAccess = "true"))
	bool bHighLightEnabled = false;

	UPROPERTY(VisibleAnywhere, BlueprintReadOnly, Category = "HighlightComponent", meta = (AllowPrivateAccess = "true"))
	TEnumAsByte<ECollisionChannel> TraceChannel;

void UHighlightComponent::CursorTrace()
{
	if(!bHighLightEnabled) return;

	//获取角色控制器
	const APlayerController* PlayerController = GetWorld()->GetFirstPlayerController();
	if (!IsValid(PlayerController)) return;

	// 获取光标下的碰撞信息,并存储在CursorHit中
	PlayerController->GetHitResultUnderCursor(TraceChannel, false, CursorHit);

	//后面的一样
}

